

この記事でのバージョン
・Unity 2022.3.9f1
・Localization 1.4.5
インストール
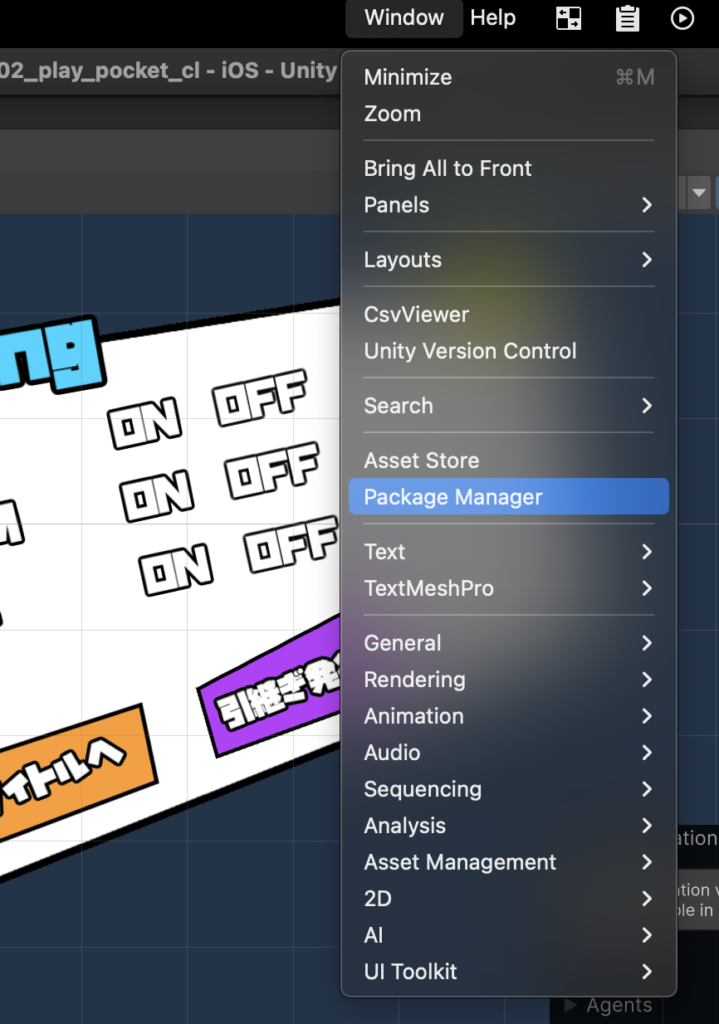
パッケージマネージャを開きます
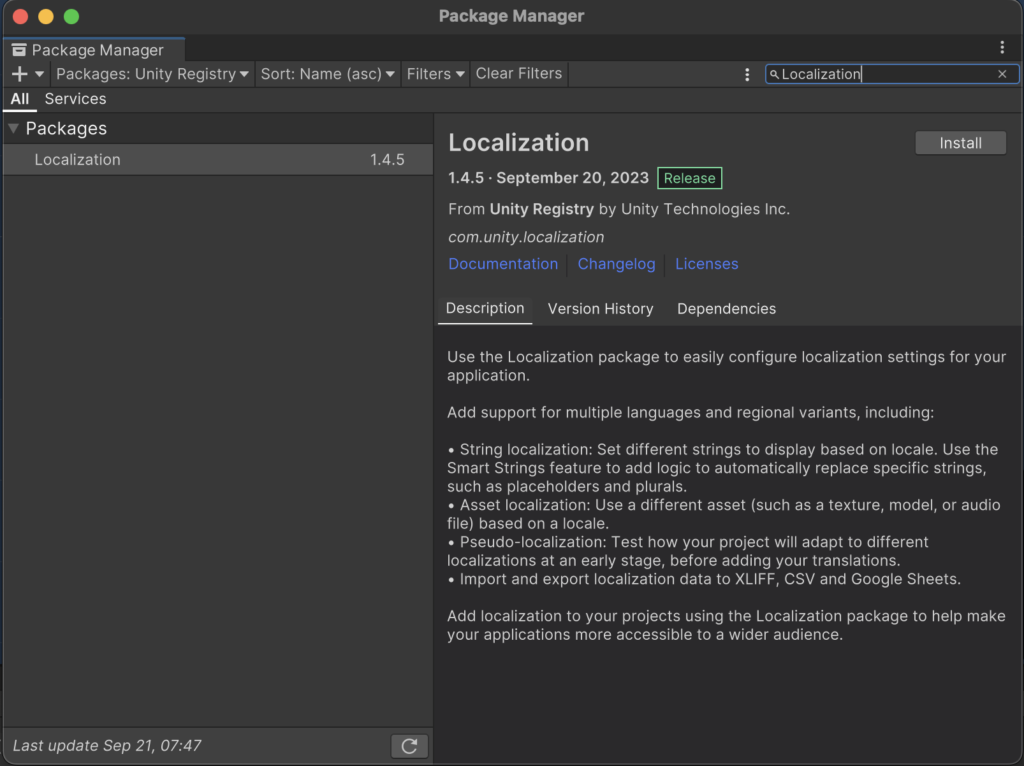
Unity Registryを選択肢検索欄で”Localization”と検索してInstall
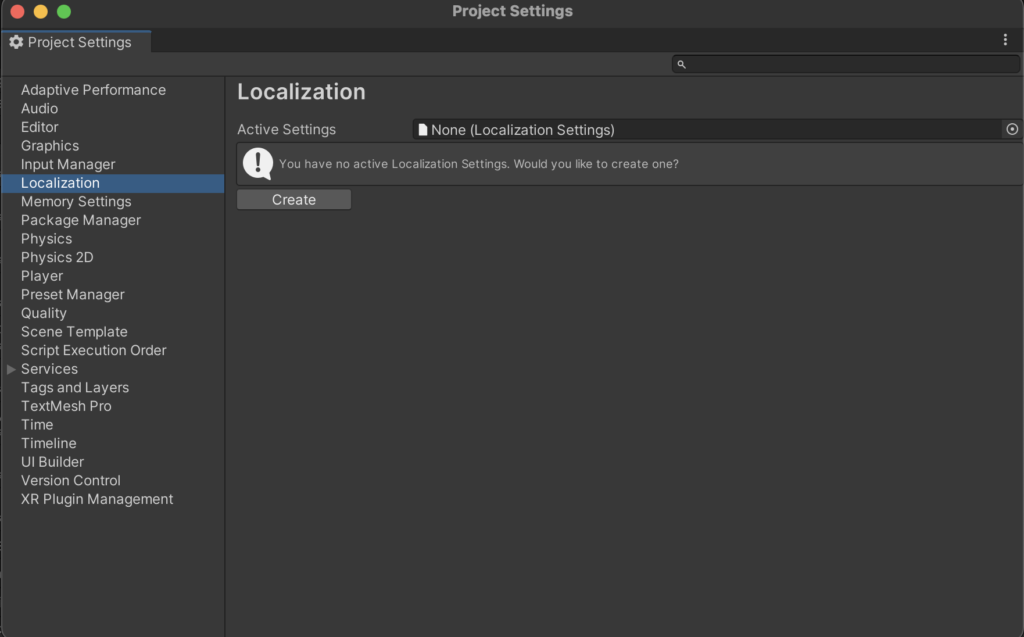
設定
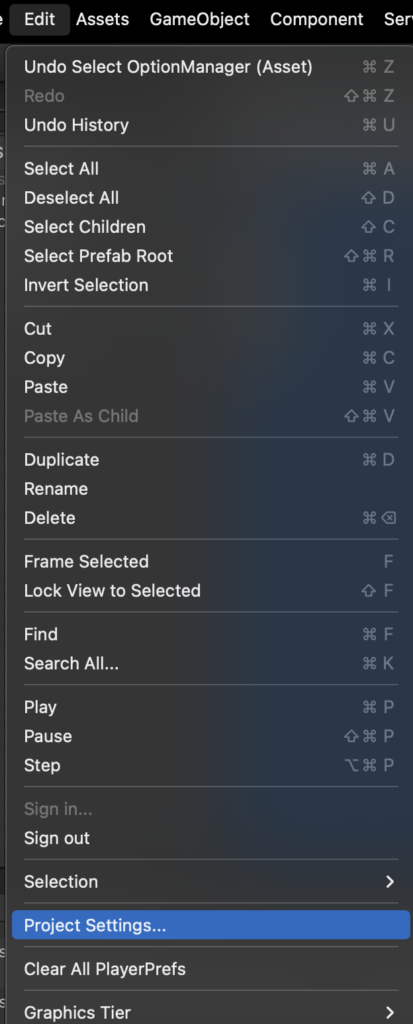
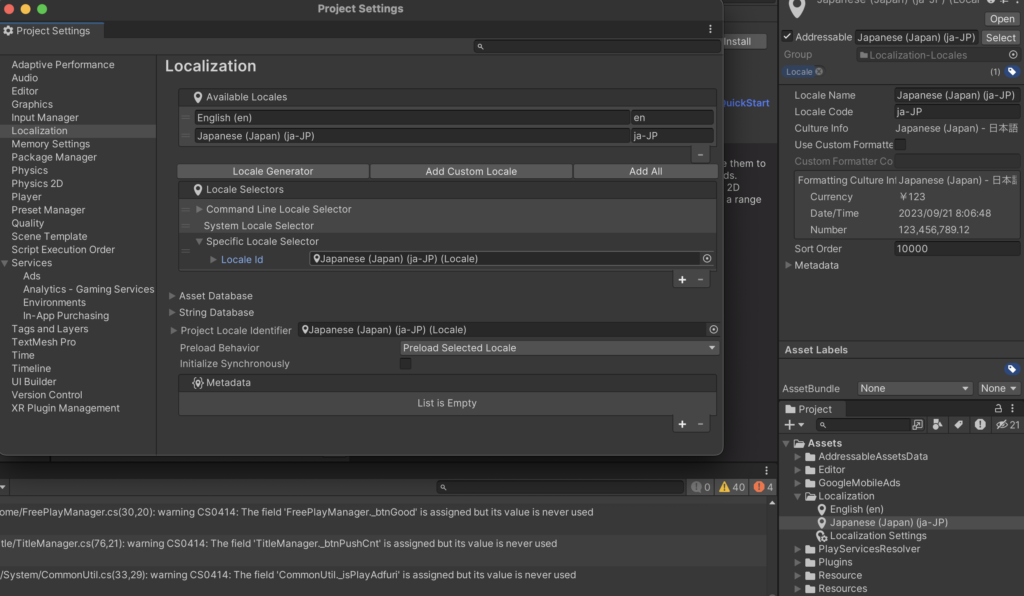
ProjectSettingsを開く
Localizationの欄を選択しCreateボタンを押下
Localizationインストール直後で表示されていない場合はUnityを再起動
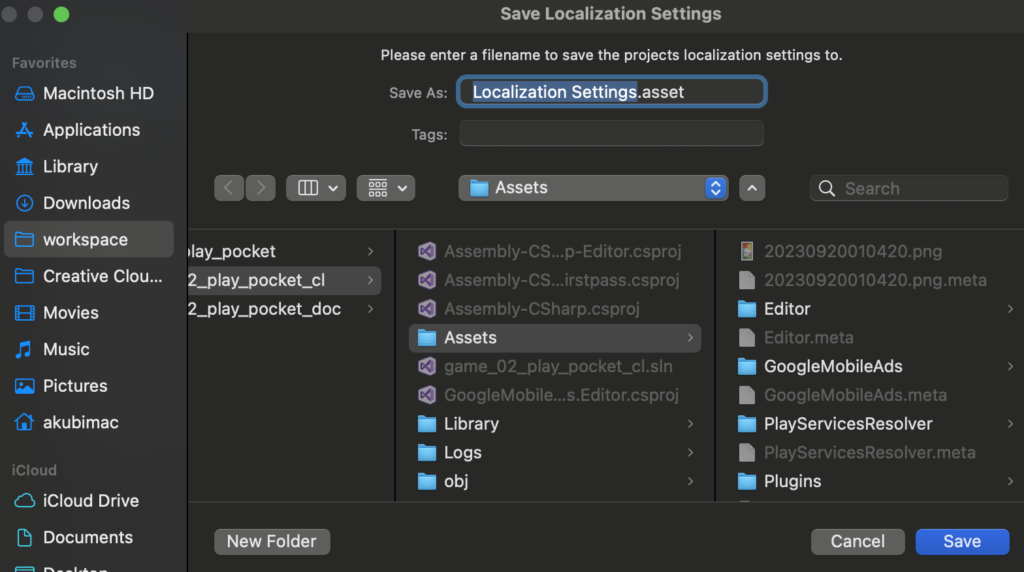
Localizationファイルを保存
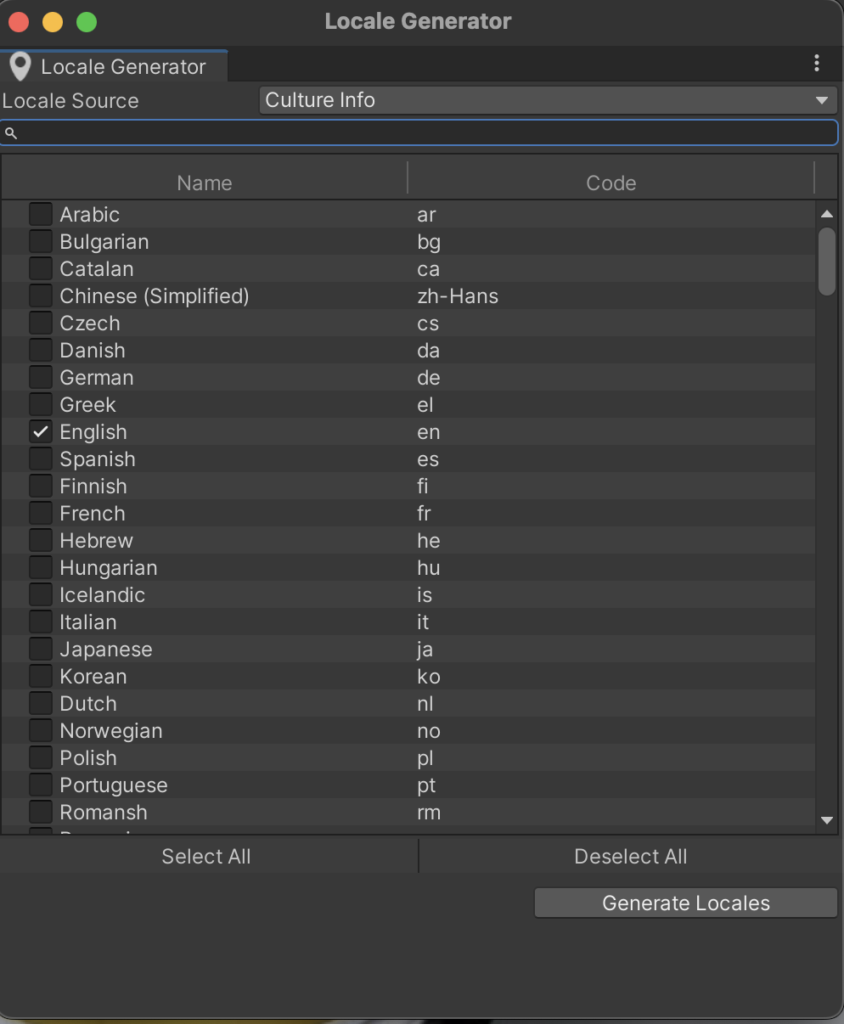
Local Generatorを選択
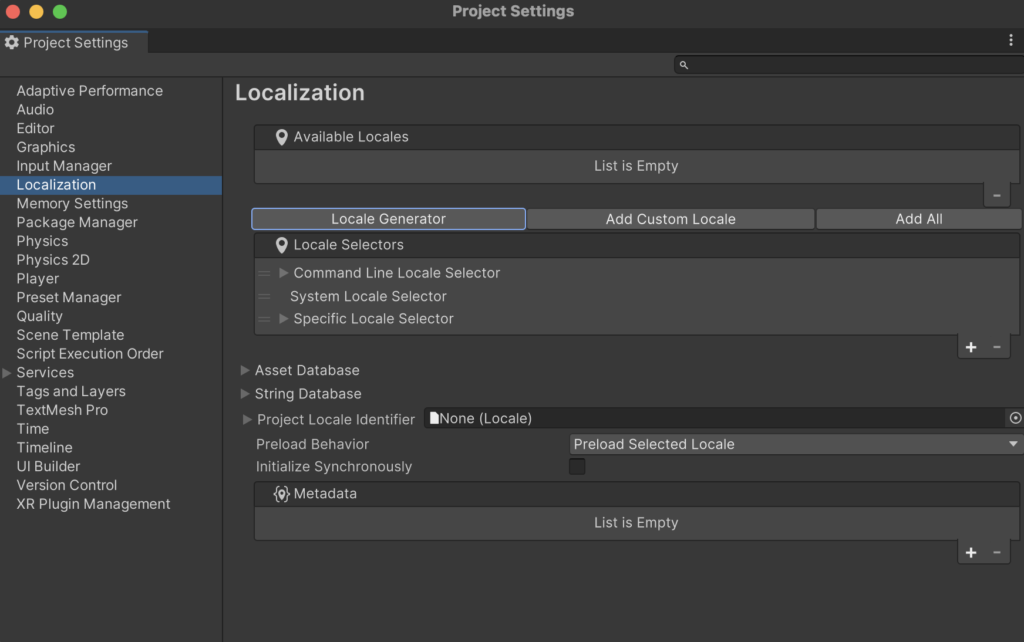
使用する言語を選択
デフォルト言語にしたい言語のファイルをSpecific Local SelectorとProject Local Identifierに設定
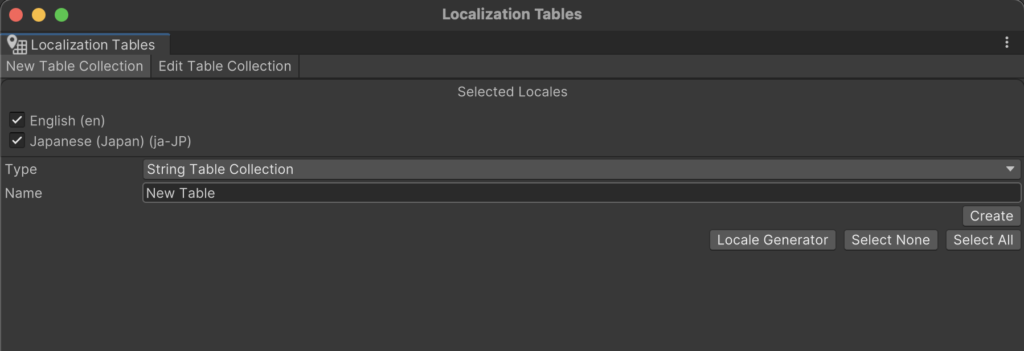
Window -> Asset Management -> Localization Tablesを選択

Typeを String Table Collectionに設定しCreate
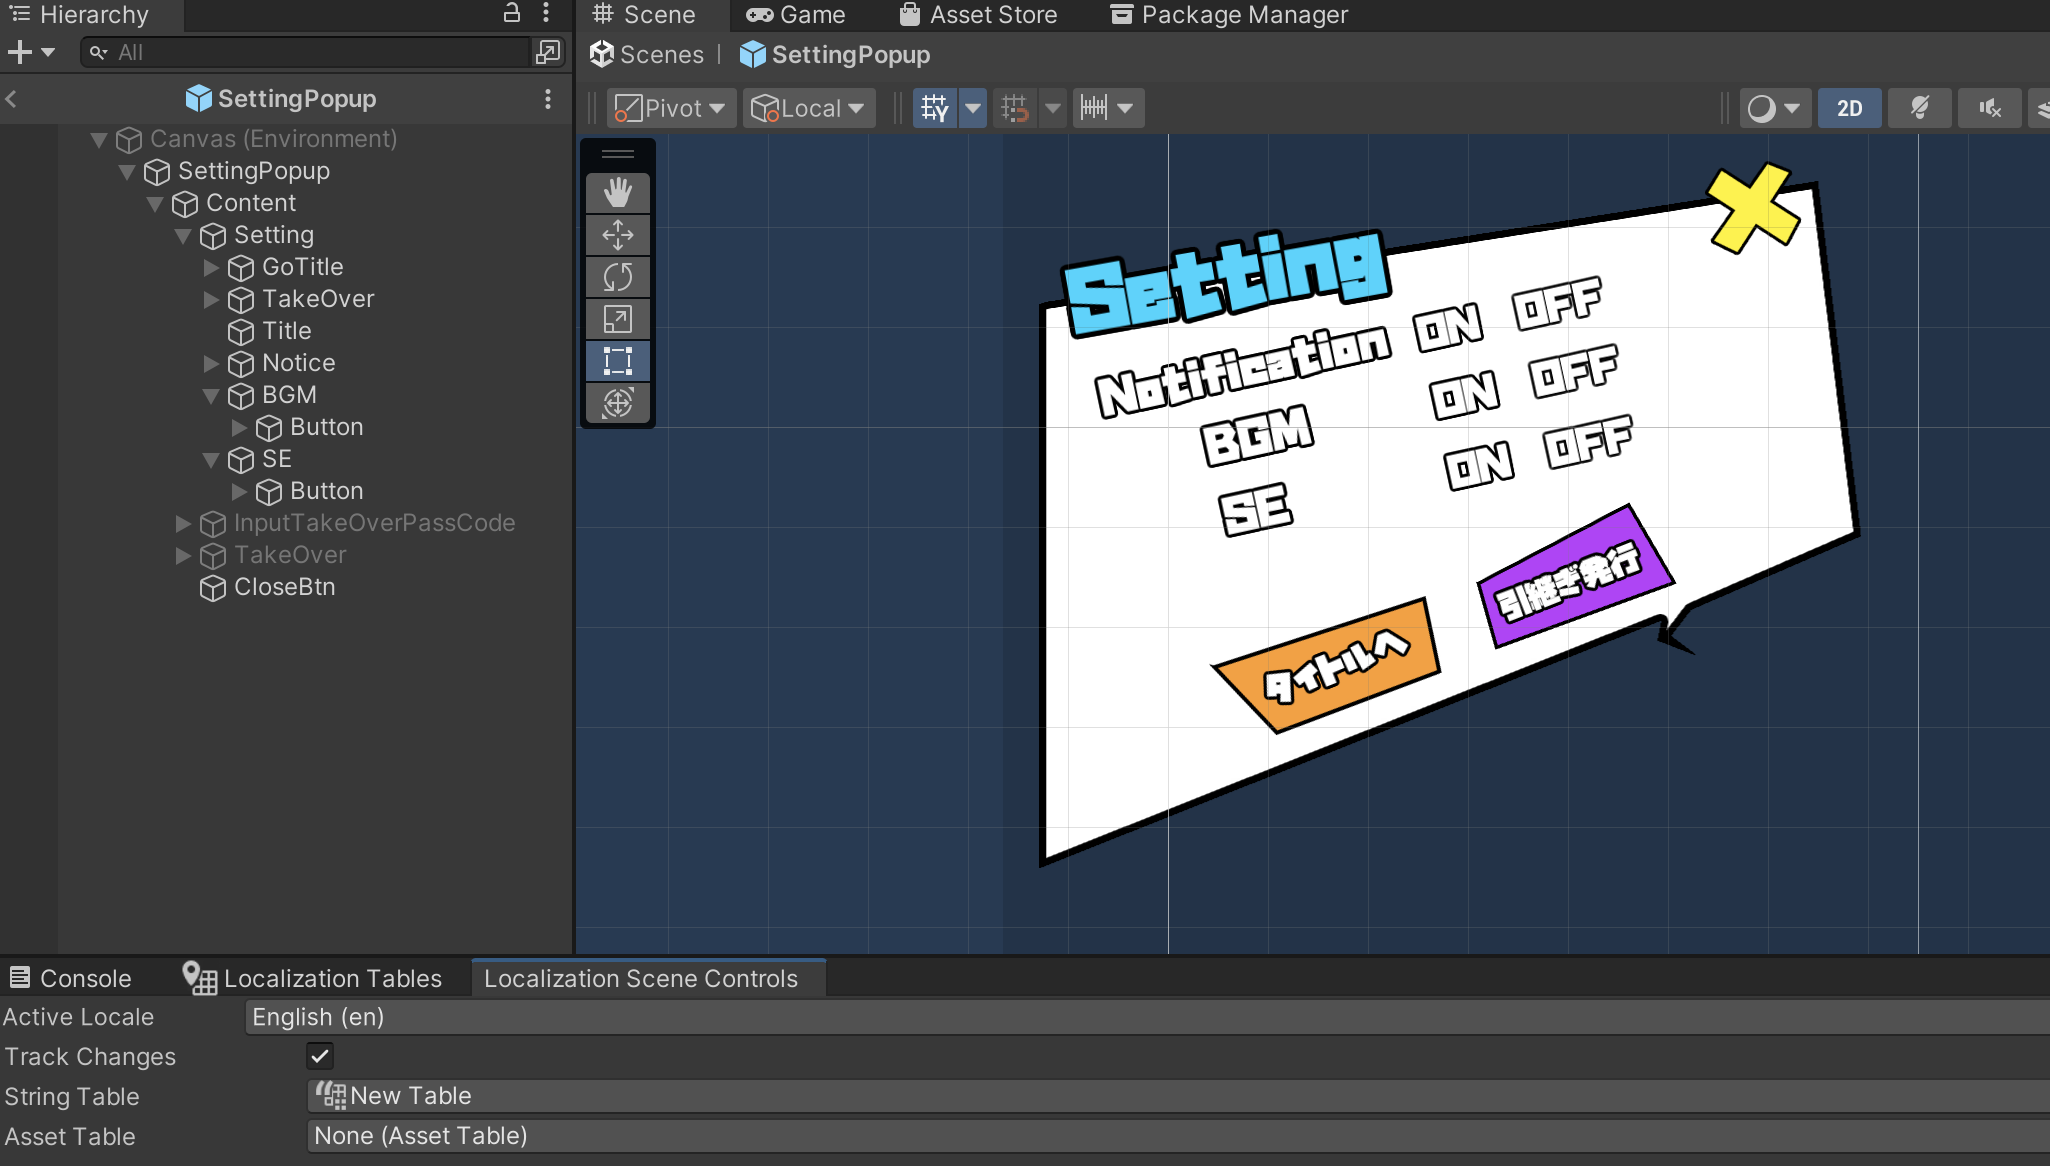
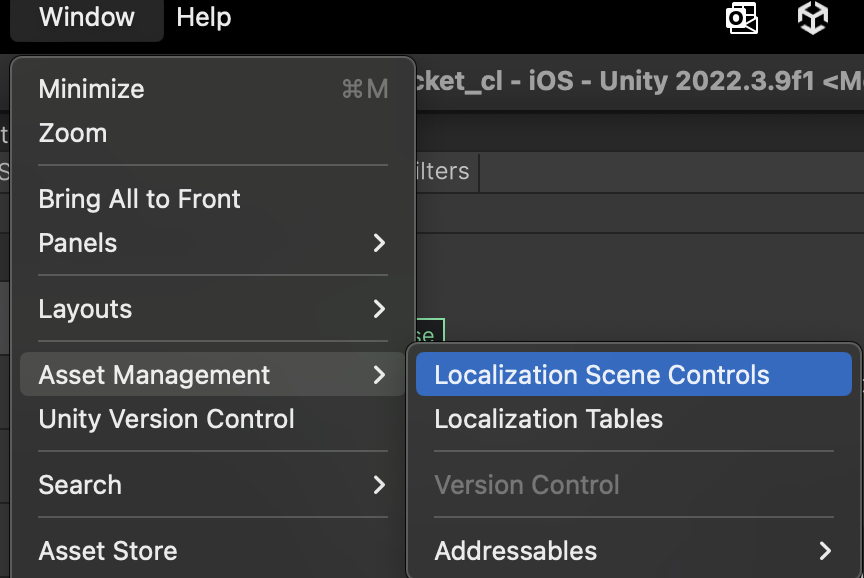
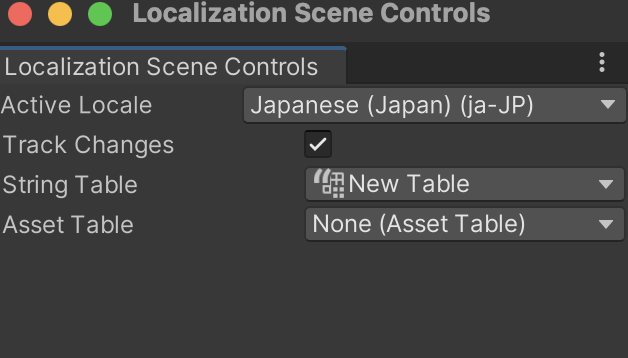
Localization Scene Controlsを選択
StringTableに先ほど作成したテーブルを設定し、TrackChangesのチェックをオンにします
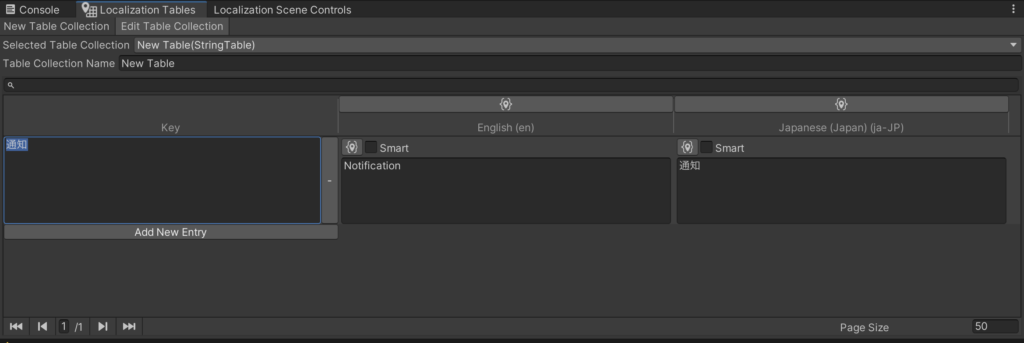
文字の追加と紐づけ
LocationTableでキー(任意)とEnglish,Japanなどのそれぞれ追加した言語の欄にそれぞれの翻訳を追加
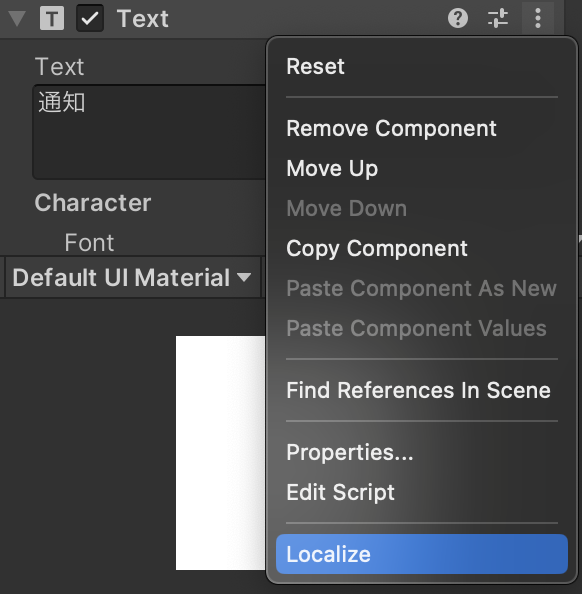
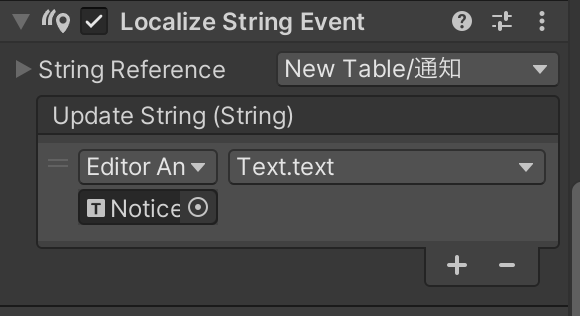
シーン上のTextオブジェクトの横のメニューからLocalizeを選択
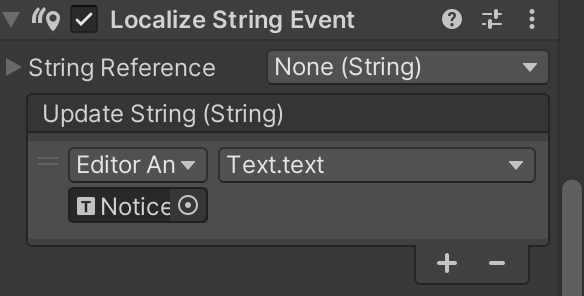
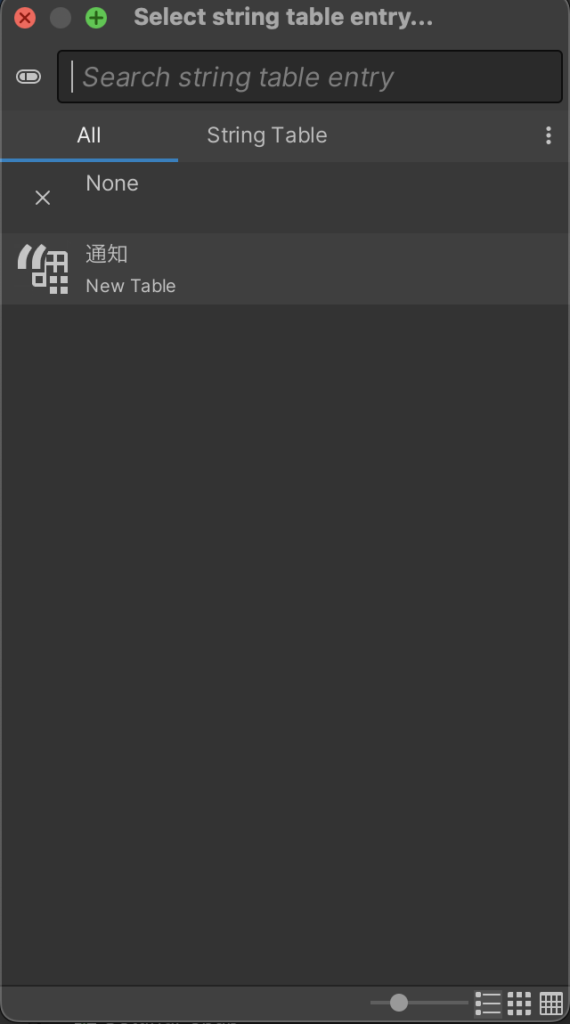
String Referenceに先程追加した設定値を設定
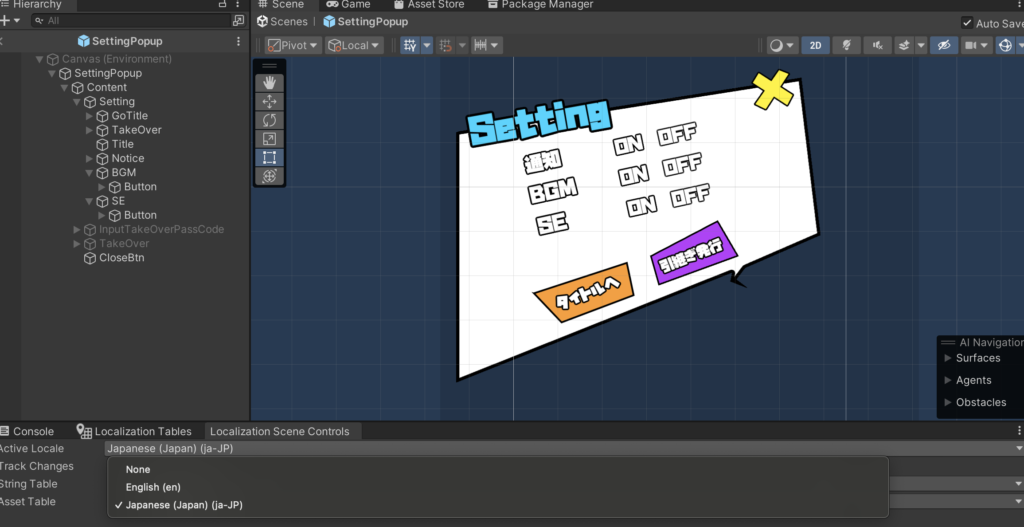
設定後
Localization Scene Controllerで言語を切り替えて文字が切り替わることを確認
日本語
英語

コメント
Have you ever considered publishing an e-book or guest authoring on other blogs?
I have a blog based on the same subjects you discuss and would really like to have you share some stories/information. I know my readers would appreciate your work.
If you are even remotely interested, feel free to shoot me
an email.
Stunning quest there. What occurred after? Good luck!
At this time it looks like WordPress is the best blogging platform out there right now. (from what I’ve read) Is that what you are using on your blog?
Yes, this blog is made with WordPress.